Donor Tools

Uploading Your File - Donor Tools User Guide

  • Sign In
  • Quick Start
    • Welcome Video
    • Signing In
    • Public Profile
    • Set Your Fiscal Year
    • Setting Up PayPal
    • System Requirements
  • Importing Data
    • Introduction To Importing
    • Uploading Your File
    • Importing Donors
    • Importing Donations
    • Importing A Mixed File
    • Data Quality
    • Supported Fields
    • Undoing An Import
    • Updating Existing Records
    • Data Tips
  • Data Management
    • Creating A Donor
    • Recording A Donation
    • Editing A Donation
    • Editing A Donor
    • Merging Two Donors
    • Funds
    • Sources
    • Important Dates
    • Soft Crediting A Donation
    • Relationships
    • Users
    • Custom Data Types
    • Find Duplicates
    • Pledges And Pledge Payments
    • Recording A Note
    • Tag Many Donors At Once
    • Tagging Donors
  • Reporting
    • Donations Report
    • Exporting Donations
    • Exporting Donors
    • Generate A Tax Receipt
    • Print A Report
    • Smart Tag: Donors In Year
    • Smart Tag: Filter By State
    • Smart Tag: New Donors
    • Smart Tags
    • Year End Reports
  • Acknowledgements
    • Thank You Emails
    • Thank You Letters
    • Mail Merge Fields
    • Letterhead
    • Year End Statement: Email
    • Year End Statement: Print
  • Fundraising
    • Creating Fund Pages
    • Customizing Fund Pages
    • Fundraising Event
    • Online Donation Widget
    • Paypal: Recurring Donations
  • Tips And Tricks
    • Anonymous Donors
    • Bulk Mailings
    • In Kind Donations
    • Print Labels & Envelopes
    • Volunteer Hours
  • Integrations
    • MailChimp
    • PayPal
    • Quickbooks Export
  • Donor Self Service
    • Signup As A Donor
  • API
    • Overview
    • Pagination
    • Funds
    • Sources
    • People
    • Donations
    • Emails
    • Organization
    • Soft Credits
    • Types

Uploading Your Data File

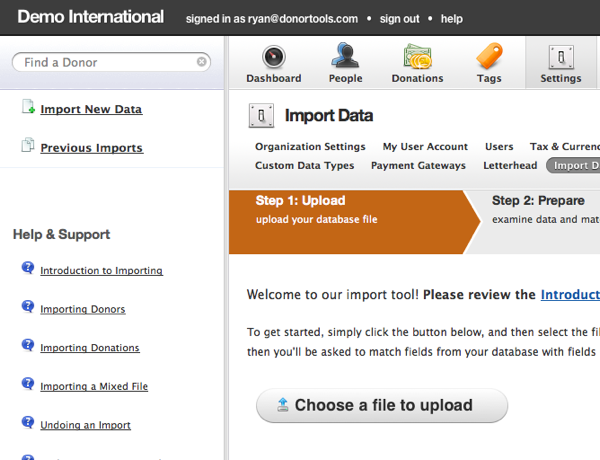
1. From your welcome screen, click "Import Donors". If you're not on your welcome screen, click the Settings tab, then click "Import Data"

2. Click the "Choose file to upload" button, and locate your file. When you click "OK", your upload will begin automatically.

Next Steps

Now you'll need to prepare your file. This involves matching columns from your uploaded file with fields in Donor Tools' database. Depending on the type of data that you're uploading, follow one of the guides below:

  • Donors only - a single file containing a list of donors, but not donations
  • Donations only - a single file containing a list of donations, but not donors
  • Mixed - a single file containing both donors and donations

All text and images copyright © 2008-2022 Donor Tools. All rights reserved.

Donor Tools™ is a big idea by Higher Pixels, LLC.

Privacy Policy • Terms of Service • Contact Support