Donor Tools

Setting Up PayPal - Donor Tools User Guide

  • Sign In
  • Quick Start
    • Welcome Video
    • Signing In
    • Public Profile
    • Set Your Fiscal Year
    • Setting Up PayPal
    • System Requirements
  • Importing Data
    • Introduction To Importing
    • Uploading Your File
    • Importing Donors
    • Importing Donations
    • Importing A Mixed File
    • Data Quality
    • Supported Fields
    • Undoing An Import
    • Updating Existing Records
    • Data Tips
  • Data Management
    • Creating A Donor
    • Recording A Donation
    • Editing A Donation
    • Editing A Donor
    • Merging Two Donors
    • Funds
    • Sources
    • Important Dates
    • Soft Crediting A Donation
    • Relationships
    • Users
    • Custom Data Types
    • Find Duplicates
    • Pledges And Pledge Payments
    • Recording A Note
    • Tag Many Donors At Once
    • Tagging Donors
  • Reporting
    • Donations Report
    • Exporting Donations
    • Exporting Donors
    • Generate A Tax Receipt
    • Print A Report
    • Smart Tag: Donors In Year
    • Smart Tag: Filter By State
    • Smart Tag: New Donors
    • Smart Tags
    • Year End Reports
  • Acknowledgements
    • Thank You Emails
    • Thank You Letters
    • Mail Merge Fields
    • Letterhead
    • Year End Statement: Email
    • Year End Statement: Print
  • Fundraising
    • Creating Fund Pages
    • Customizing Fund Pages
    • Fundraising Event
    • Online Donation Widget
    • Paypal: Recurring Donations
  • Tips And Tricks
    • Anonymous Donors
    • Bulk Mailings
    • In Kind Donations
    • Print Labels & Envelopes
    • Volunteer Hours
  • Integrations
    • MailChimp
    • PayPal
    • Quickbooks Export
  • Donor Self Service
    • Signup As A Donor
  • API
    • Overview
    • Pagination
    • Funds
    • Sources
    • People
    • Donations
    • Emails
    • Organization
    • Soft Credits
    • Types

Related

  • Setting Up Your Organization’s Public Profile
  • Customizing Fundraising Pages
  • Recurring Donations

Setting Up PayPal

Setting up PayPal in Donor Tools is easy and just takes about a minute.
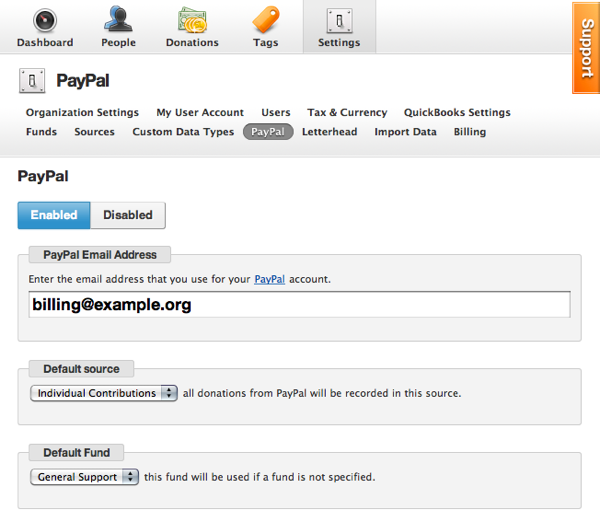
  1. Click Settings.
  2. Click PayPal.
  3. Enable PayPal by clicking “Enabled”.
  4. Enter your PayPal email address. This is the email address that you use to access your PayPal account.
  5. Select your Default Source. This is the source that will be used when recording all PayPal transactions. (Don’t have a PayPal account? Click here to get one.)
  6. Set your Default Fund. This is the fund that will be used if one is not specified by the donation form.

Donor Tools Paypal Settings

Automatic Acknowledgement Email

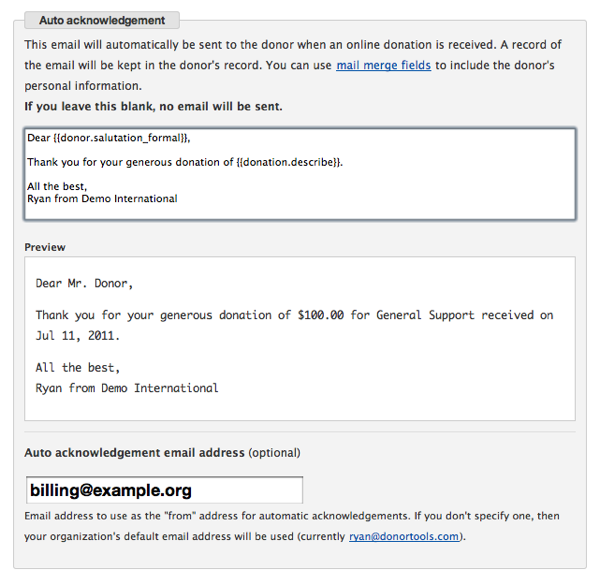
Promptly acknowledging a donation is effortless with Donor Tools’ Auto Acknowledgement. Simply set up the email template once, and each donation will automatically be acknowledged with a personalized email to the donor.

Type your email template in the text box. As you type, a preview will appear below. To personalize the email, you can use our Mail Merge fields.

Paypal Auto Acknowledgement

Enable Your Public Page

After you set up PayPal, you may see a message saying that your Public Page is not enabled. Click on Settings and follow these instructions to enable your public page.

Public Profile Disabled Warning

All text and images copyright © 2008-2022 Donor Tools. All rights reserved.

Donor Tools™ is a big idea by Higher Pixels, LLC.

Privacy Policy • Terms of Service • Contact Support